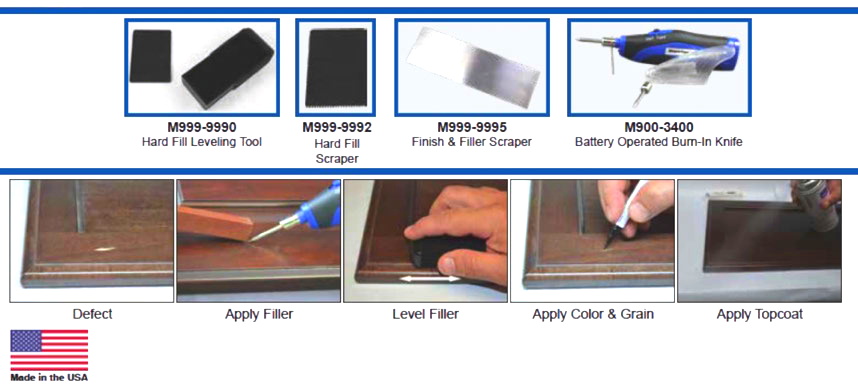
HARD FILL Procedure Instructions
Step-By-Step Instructions
Step 1
Select he correct color of Hard Fill.
Clean the area to be repaired with a piece of fine grit sandpaper,
and use a sharp knife to remove any splinters. No damage can protrude above the surface.
Step 2
Choose either the flat tip or pointed tip for the Battery Operated Burn-In Knife.
Step 3
Turn on the Battery Operated Burn-In Knife and allow it to heat up for about 30 seconds
Step 4
Depress the button, slide the switch up and press the tip into the hard fill solution
Step 5
Once the material is on the tip, slowly press the solution into the repair.
Once the filler has slightly cooled, take a worn credit card and press
the molten material into the entire area.
Step 6
Once the Hard Fill has dried, use the Hard Fill Leveling Tool
to remove all excess material from the repair.
This tool will not scratch or harm the surrounding area of the repair.
Step 7
Take a lint-free cloth or paper towel and buff the repair.
If desired, take a Brush Tip Graining Marker and apply grain to the repair.
Step 8
Topcoat an seal in the repair area with the appropriate sheen finish
Note: The Hard Fills Do Not require use of the Burn-In Balm
as used with the E-Z Flow™ Burn-In Sticks.
 DARK UMBER
 CREAM
CREAM TRANS GRN BROWN
 BROWN MAHOGANY
 SNOW WHITE
 CHAMPAGNE
 NATURAL TONE
 ANTIQ
ANTIQ